


If you are looking to write a book, you know how important it is to have a good writing and formatting tool.
Atticus is a writing tool that lets you create print and digital books all within one writing software. The Atticus templates are great for authors to simply fill in and then have a book ready to go.
If you've been looking for a tool to make your book writing even easier, in this article we'll be going over what Atticus is, how much it costs, why you should use it, and take a look at the templates they offer.
Here's what you need to know about using Atticus templates:
Why Use Atticus Templates?
Atticus was built by authors, for authors. So that means they have your needs and concerns in mind for each and every book.
They made sure that it's easy to use and won't be in the way of your writing. You just need to focus on the creativity and let their software do the rest.
If you don't use templates when it comes to publishing your book, you're going to have a hard time getting the format to fit in the guidelines of some publishing companies.
That means your book could end up looking a little off on some reading devices or with the actual physical print version.
Templates save you from having to format and fix everything yourself, which can take countless hours to do and customize. If you are not proficient with technology, you might even have to hire someone to put it together. That is why templates are almost always worth it for book publishing.
What Atticus Offers
Since Atticus was built by authors, they know what you need.
Some of these examples include:
- Being able to drag and drop chapters for easy switches
- Book reading level
- Word count
- Goal tracking so you can make sure you're hitting your word counts
You can also choose to simply use their formatting editors or templates if you prefer to do your writing in other software.
Atticus can import books from a wide variety of sources, including Scrivener, Microsoft Word, and Google Docs, just to name a few.
After you import your book, you have thousands of ways to customize the overall look and feel of your book, so you can make the exact book you've always wanted to publish. We'll cover that more down below when we get to the templates.
Before you hit publish, you will also be able to see what your book looks like on different devices, so you won't have any errors in your final draft.
How to Use Atticus Templates
Atticus currently works on these platforms:
- Windows
- Mac
- Linux
- Chromebook
With Atticus templates, you're able to customize the overall look and feel of your book. At the time of writing this article, Atticus offers 17 different templates which you can use to create 1,200+ unique combinations for a true personal touch.
Inside the software is a custom theme builder so you can adjust anything you want to meet your specific needs.
Upload your book or start from scratch
The first thing you'll want to do once you buy Atticus and login is to either upload your book or start one from scratch.
If you start one from scratch, you will be able to pick from a variety of templates at the beginning.
Here's what it looks like if you decided to start a new book from scratch:

As you can see, it is incredibly easy to set up your template and get started writing right away.
Here are the names of the templates you can choose from:
- Delta
- Elinor
- Clairmont
- Hughes
- Intratech
- Minerva
- Atreides
- Watts
- Penelope
- Delphini
- Aether
- Bonkers Books
- Minax
- Finch
- Scarlett
- Seraphina
- Titus
You'll want to choose a template based on the genre of the story you are writing.
Some examples:
- Delphini could be for a romance novel
- Aether could be for a science fiction book
- Scarlett could be for a memoir
- Bonkers Books could be for a YA novel
For almost any kind of book you want to write, there is an Atticus template ready for you to use and put together.
There is no huge learning curve to get you started on the path to writing your book. All you need to do is follow a few simple prompts and you are on your way.
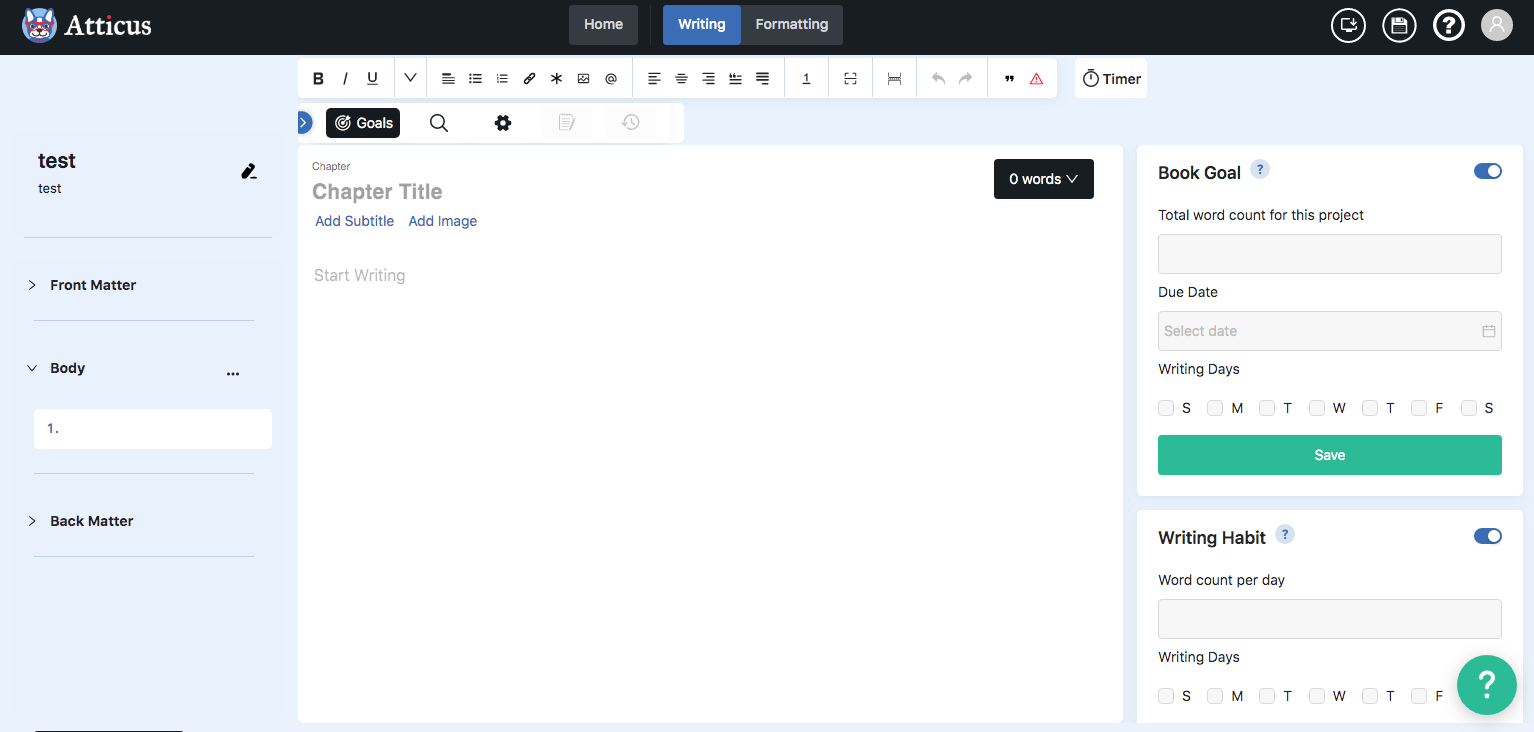
Set your writing goals
If you want, you can set daily writing goals that Atticus can track for you to help you meet every single day.
There are currently two types of goals to set:
- Book goal -- Total words for the whole book. This is where you set the total word count for your whole book, set a due date, figure out how many days per week you can write, and Atticus will tell you exactly how many words you need to hit per day to get it done.
- Writing Habit -- Word count per day. You can set your word count and then decide how many days of the week you want to hit that word count. If you are a person who likes some extra motivation, this alone could help you get writing.
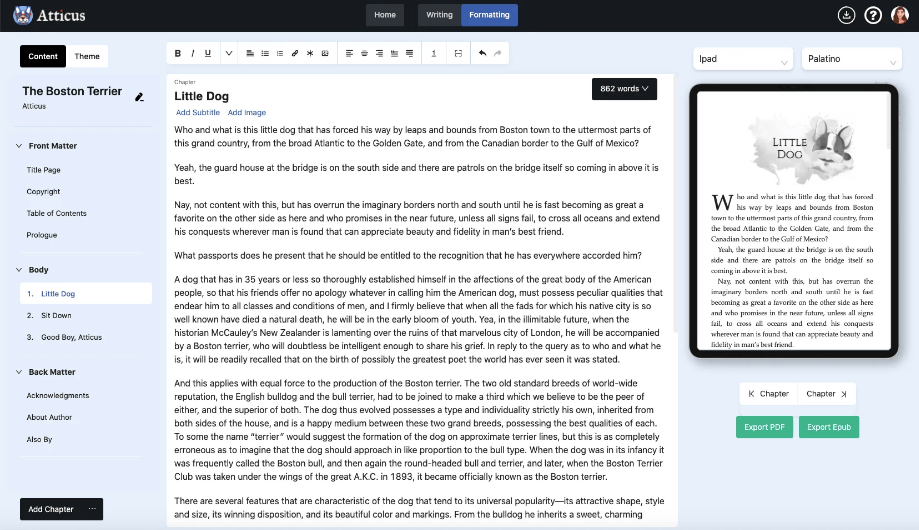
See how it looks on different devices
Due to how good the Atticus template formatting software is, you can quickly see how your book will look across various devices.
You can see how it looks on a Kindle, eBook, as a printed copy, and more.
This can also help you catch any formatting errors you need to fix so it looks good on every platform.
Export your book and publish it
The Atticus templates work with a ton of markets and platforms.
Some include:
- Barnes & Noble
- Amazon publishing
- Apple Books
- Overdrive
- Kobo
- Draft2Digital
- Smashwords
- Toino
- Scribd
Additional reasons to use Atticus for your books
There are more reasons you would want to work with Atticus for your writing software.
For one, it has online and offline mode. Not all softwares will work offline. That means you can't run away to a cabin and the woods without Wifi and keep writing.
When you are online, Atticus automatically saves and backs up your work to their cloud. That way, you do not need to worry about losing any of your writing (which is a real nightmare most of us writers have experienced).
How Much Does Atticus Cost?
As of the time of writing this article, Atticus has a one-time fee of $147 which covers both eBooks and printed book templates and formatting.
Depending on your budget, that might sound expensive, but there are not too many tools out there that can format your book so quickly and easily.
Not to mention, many authors have to hire people to format their books for them, which can often cost way more than $147.
It also helps that it's not a subscription service. Some platforms charge a monthly fee and if you stop paying it, you can lose access to your work. Instead, you pay once and you own it forever. You also receive every future update, template, or added on features for free.
If you are not thrilled, they do offer a 30-day refund if you decide it's not the right software for you.
Is Atticus Worth It?
If you're looking to make a career as an author and will be publishing multiple books, it's definitely worth purchasing Atticus to streamline your book production process. After all, hiring a formatter for each book could easily cost a few hundred dollars per year, while you'll only pay for Atticus once.
That said, if you'd rather hire a self-pubishing service to take care of your book production needs from start to finish so you can focus solely on writing, that's also an option!
