

There are many nonfiction books that need an index to be complete. Although it seems that more books are published without indexes every year, savvy self-publishers know that including an index is one way they can make their print books stand out.
A proper index can’t be produced automatically by your word processing software. An index is constructed from the concepts behind the terms and people cited within your book.
For that you need an indexer, a skilled professional who understands how readers will use this customized “search” section of your book. By cross-referencing other, related topics, the index achieves an integration of citations and underlying ideas that’s hard to replicate, even in the age of Google.
When it comes time to format your index, you may find it challenging. The index for a typical nonfiction book can look bewildering, with its entries and subentries, each with its own indentation plan.
In this article I’m going to leave aside the editorial concerns of what’s included or not included in an index, how the entries are cross referenced, and all similar concerns. Instead we’ll look at the typographic requirements and I’ll show you from the inside how I create a standard index in Adobe InDesign.
Parts of an Index
Indexes usually include various elements, each of which is treated differently:
- index title—this should look the same as other opening pages for front or back matter like your Contents page
- alpha navigators—grouping your index entries under each letter of the alphabet is the standard way to organize an index, and these letters show you where to look
- entries—the basic unit of the index, each refers to a word or concept in the book and points to where it can be found
- subentries—the simplest indexes (like the ones created in word processing programs) only have one “level” of entries—main entries—which are all equal. Most indexes include entries that are subsets of the main entries, and in complex indexes, you might find 2, 3, or 4 levels of subentries
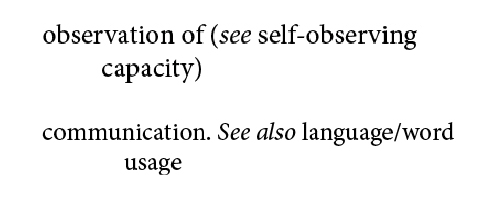
- cross references—you’ll find these in main entries in the form of “see” or “see also” instructions that point to related concepts
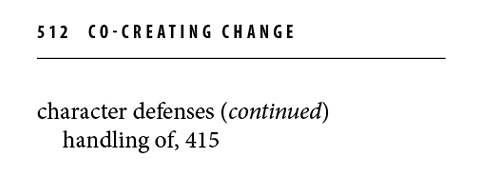
- jumps—when entries span a column or a page, you’ll usually find a (continued) flag to let you know that you’re looking at the continuation of an entry
Once we get the file from your indexer into InDesign, we’ll need to format each of these elements to complete the index.
Working With the Index File
Typically the file for your index will come from the indexer with formatting information included, otherwise you would have no way to tell which are main entries and which are subentries. Indexers use dedicated programs such as Cindex indexing software.
This program can “export indexes as formatted documents (Rich Text Format, QuarkXPress, InDesign, plain text, tagged text)”
Depending on the software used, the format the file was exported to, and whatever your personal workflow is, you’re going to need to assign paragraph styles to the various index elements and levels.
You might want to do this through InDesign’s Import Options dialog (check the box for “Show Import Options” when you go to Place the file) or however you usually do this with your text files. InDesign gives you a lot of choices including format-dependent searches and the aforementioned Import Options. Some people prefer manual formatting. The important thing is to make sure you are mapping your paragraph styles accurately to the styles or tags included in the index file.
(Don’t forget that once you get the file placed in InDesign, you’ll want to swap out the local formatting—usually there’s a lot of italics in indexes—for a character style.)
Establish Levels, Set Indents
Probably the most confusing part of formatting an index is the way the indentation works. All entries will use a hanging indent where the first line of the entry is longer than subsequent lines, which are more deeply indented.
But how much?
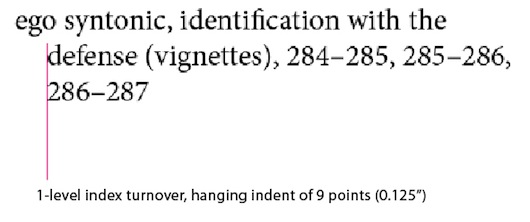
That depends on how many levels of entries you have. In a simple index with only one level (all entries are main entries) this is pretty easy to accomplish. For reasons we’ll discover in a minute, I use a fairly small indent, usually 9 points (.125 inches, usually known as 1/8 inch).
This is what such an index would look like:
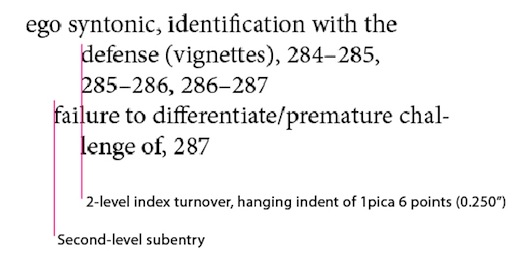
Okay, so how about a 2-level index? The second level entries have to be indented so they appear underneath and obviously subsidiary to the main entries. We have to take this into account when we set the indentation for our main entries, to keep readers from getting confused.
The aim here would be that main entries are at the left margin, subentries are indented slightly from the left margin, and all turnover lines for both levels would indent to the same point.
(Turnover lines and the second and succeeding lines in any one index entry.)
So here’s how that would look, taking both levels into account.
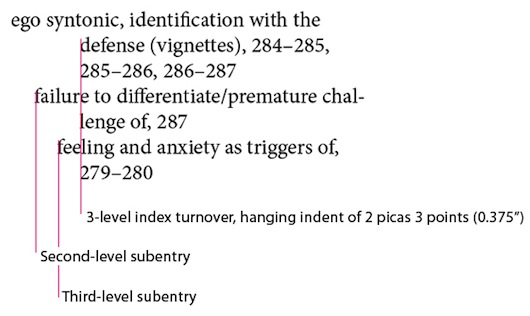
Once you understand this principle, you can see that this would apply exactly the same way to a 3-level index. (This is no joke, I’ve done several of these over the past couple of months). And now you know why we want to pick a fairly small increment for our indents, otherwise we would end up with an impossibly short line by the time we got to a third-level entry:
Formatting Other Elements
- alpha navigators—you can get creative here if you like, use your display typeface for these stand-alone letters, add a rule above or below to more clearly point to the alphabetical breaks, or simply add a little space to separate one section of entries from another. Make sure you set your “Keep” options correctly so this element doesn’t separate from at least the first entry beneath it.
- cross references—standard style dictates that all mentions of these directional words—“see” and “see also” appear in italics
- jumps—when an entry spans two columns or two pages, you’ll want to include a mention of that for readers. This takes the form of “Entry name” (continued) where the entry name is whatever entry includes the break, and the word continued is in italics (but not the parentheses)
- page ranges—don’t use a hyphen here, you want a real en-dash (option-hyphen on a Mac, alt-hyphen in Windows)

InDesign Indent Settings
Here are the settings I use for 1-, 2-, and 3-level indexes. Typically type is set at 8 or 9 point with 1.5 or 2 points of leading (e.g. 8.5/10 or 9/10.5). These are all set in the Paragraph Style Options/Indents and Spacing dialog box.
1-level index
Main index entry
Indent left = 9 points (.125″)
First line indent = -9 points (-.125″)
2-level index
Main index entry
Indent left = 1 pica 6 points (.250″)
First line indent = -1 pica 6 points (.250″)
Secondary index entry
Indent left = 1 pica 6 points (.250″)
First line indent = -9 points (-.125″)
3-level index
Main Index entry
Indent left = 2 picas 3 points (.375″)
First line indent = -2 picas 3 points (-.375″)
Secondary index entry
Indent left = 2 picas 3 points (.375″)
First line indent = -1 picas 6 points (-.250″)
Tertiary index entry
Indent left = 2 picas 3 points (.375″)
First line indent = -9 points (-.125″)
Formatting an index can be a complex piece of work, but here’s a pro tip that should help. Because InDesign allows us to copy Paragraph Styles from one document to another, you don’t have to keep repeating all these calculations. Instead, when you start a new book, just copy part of an existing index into your new book file and all the styles will copy along with the text.
You can then adjust the fonts to match the current book and you’ll be good to go right away. And here’s another pro tip: create a library of styles you use often, either with InDesign’s Library feature, or by simply creating an InDesign document and storing them there for future use.
If you have any questions about this process, please let me know in the comments.
Resources
- American Society of Indexers (ASI)
- ASI’s list of indexing software
- ASI Indexer Locator (includes subject-matter categories)
- Adobe Creative Cloud, including InDesign
- Posts on book design
(These samples are all from Jon Frederickson’s Co-Creating Change.
